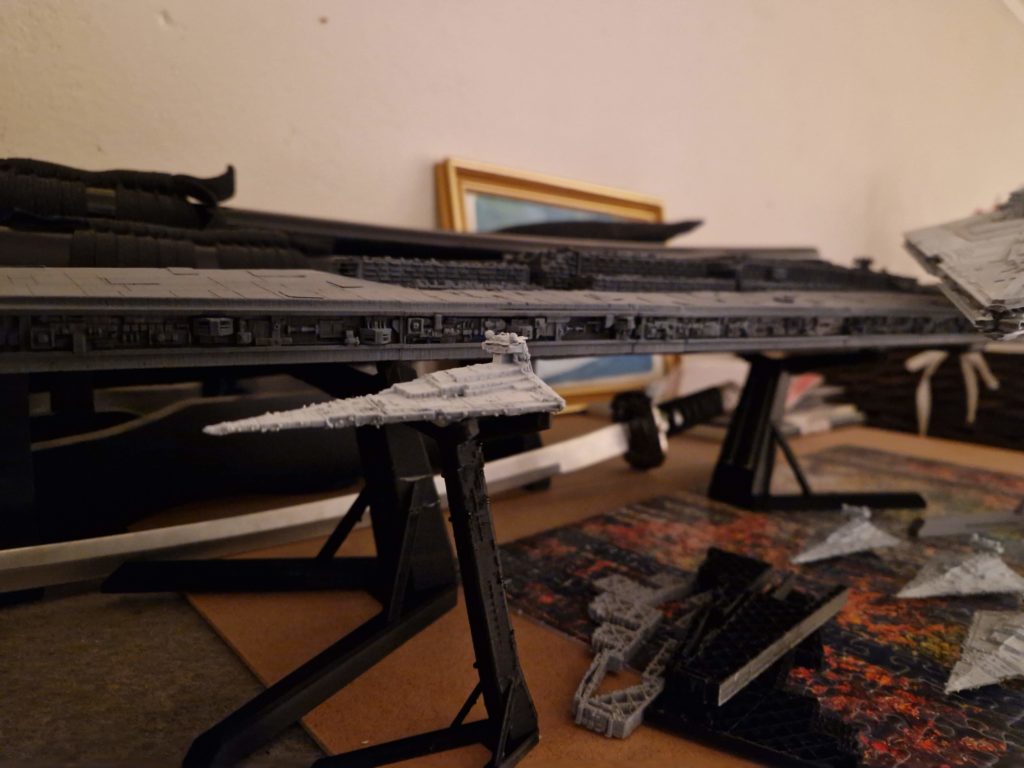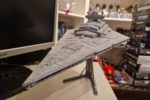

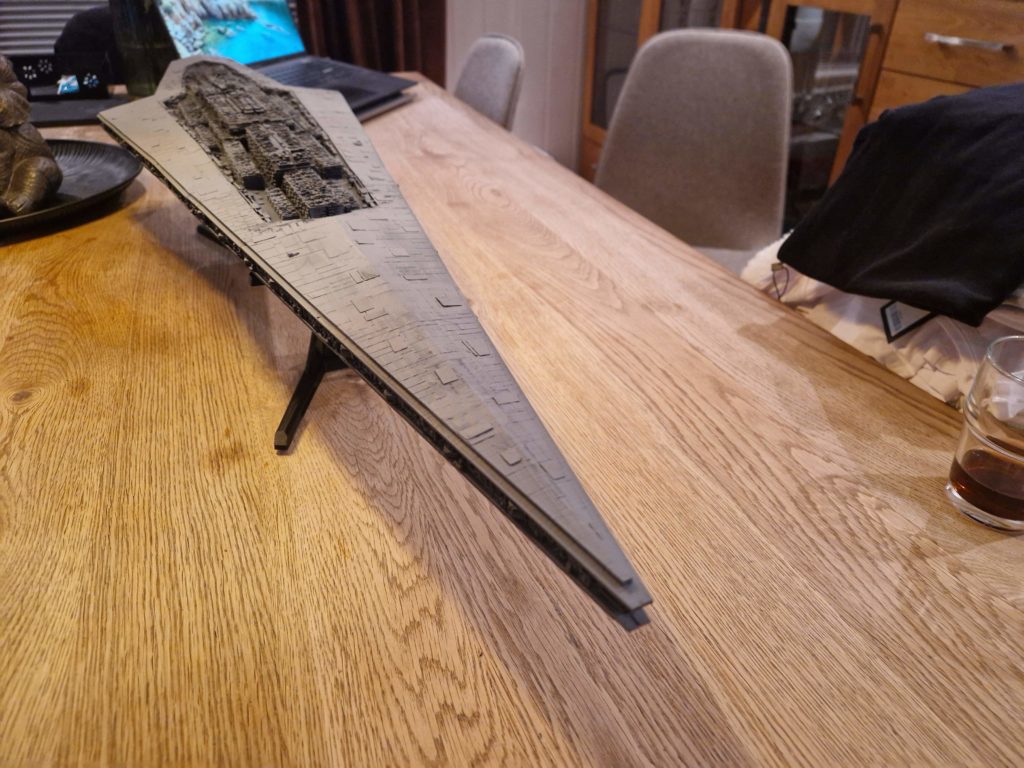
The Super Star Destroyer Executor is one of the most iconic ships in the Star Wars universe—Darth Vader’s personal flagship, the command vessel of the Imperial Fleet, and the massive dagger‑shaped warship that dominates every scene it appears in. Recreating it as a 1‑meter‑long 3D‑printed model is not a simple download‑and‑paint project. This build required cutting the digital model into workable STL sections, printing dozens of large and small parts in PLA, and assembling them into a rigid, highly detailed replica worthy of the Executor’s cinematic presence.
“The Executor wasn’t just a ship—it was a symbol of Vader’s authority. When it arrived, the battle was already lost.”
This worklog documents the entire process: slicing, printing, assembling, sanding, painting, and finishing a display‑scale Executor that captures the cold, imposing look of Vader’s flagship as seen in The Empire Strikes Back and Return of the Jedi.
Designing and Preparing the Model
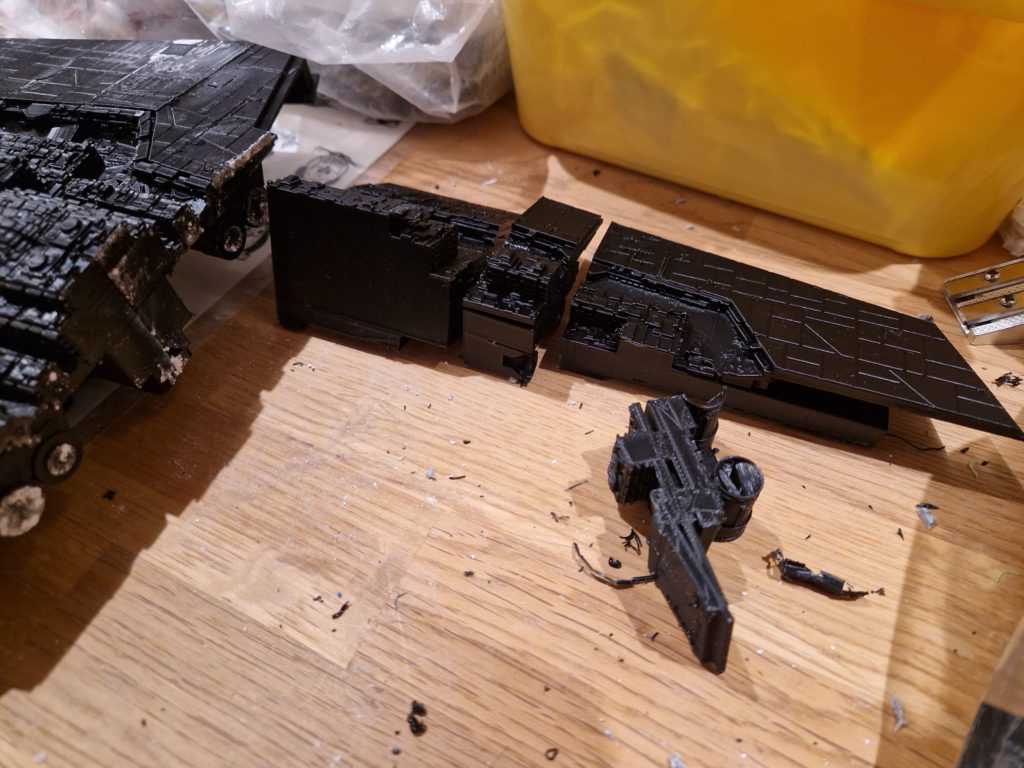
Breaking the Ship Into Printable Sections
A 1‑meter model cannot be printed in one piece on any standard FDM printer. The digital model was divided into:
- Upper hull plates
- Lower hull plates
- Side trench modules
- Bridge tower and sensor domes
- Engine cluster
- Internal support ribs
Each STL was cut with alignment keys and internal channels to ensure the final assembly would be straight and structurally sound.
Print Settings for Large PLA Parts
To preserve the Executor’s sharp geometry:
- Layer height: 0.16 mm for detail
- Walls: 4–5 perimeters for rigidity
- Infill: 10–20% depending on part size
- Supports: Only for overhangs in the trench and engine areas
- Filament: Grey PLA for easier priming and sanding
Large hull plates required slow, stable printing to avoid warping.
Printing the Executor
Managing Large Prints
Some hull sections took over 20 hours each. To ensure consistency:
- Bed adhesion was reinforced with glue stick or PEI sheets
- Cooling was reduced on the first layers
- The printer was enclosed to prevent temperature swings
The long, flat surfaces of the Executor are unforgiving—any warp would misalign the entire ship.
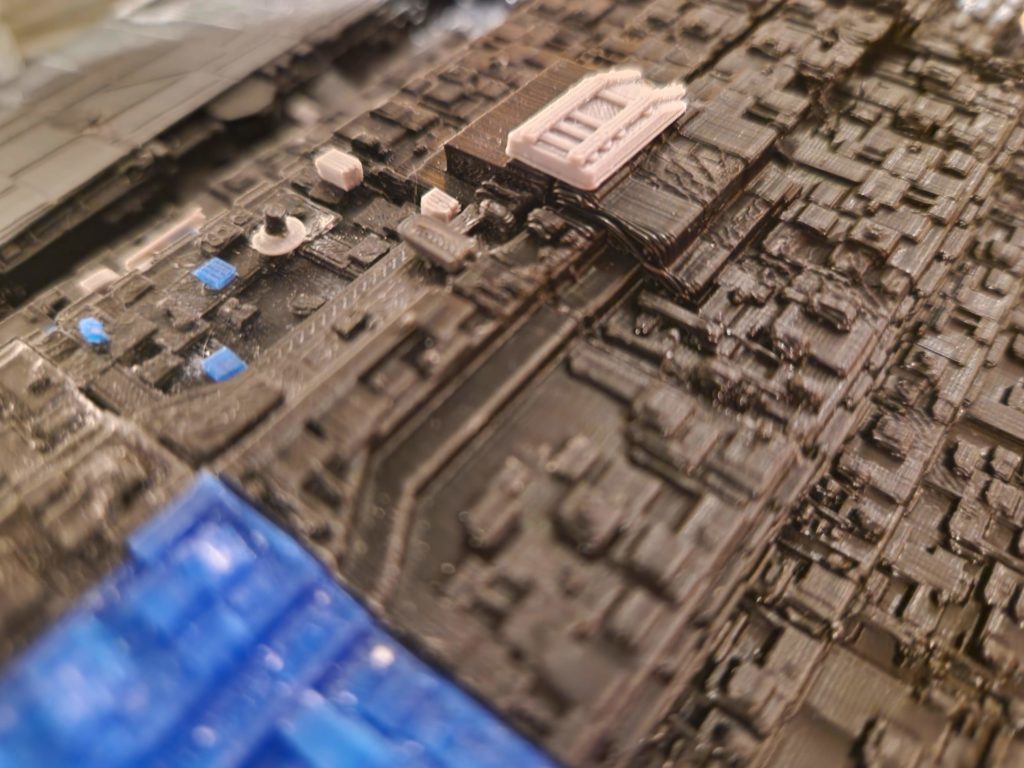
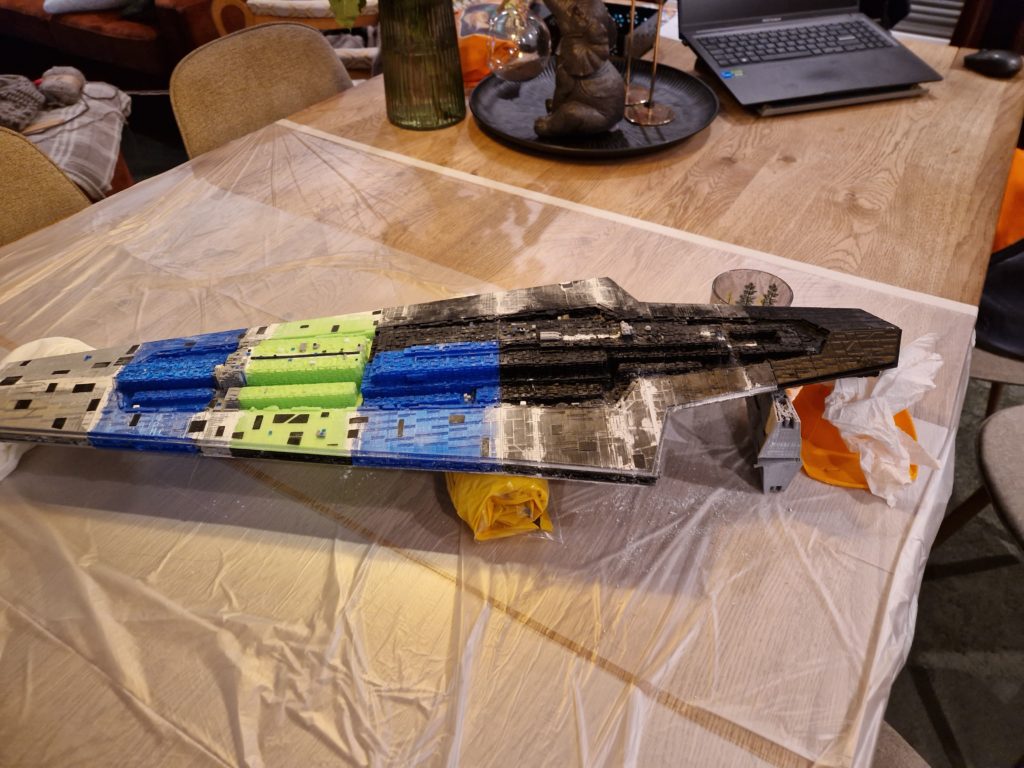
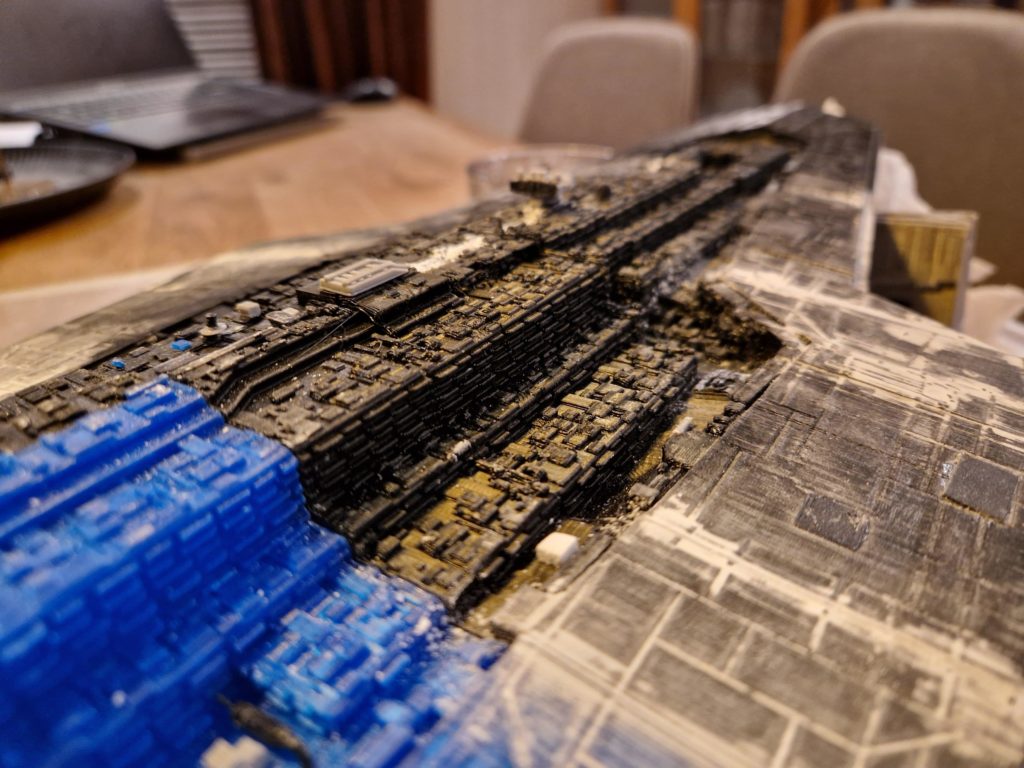
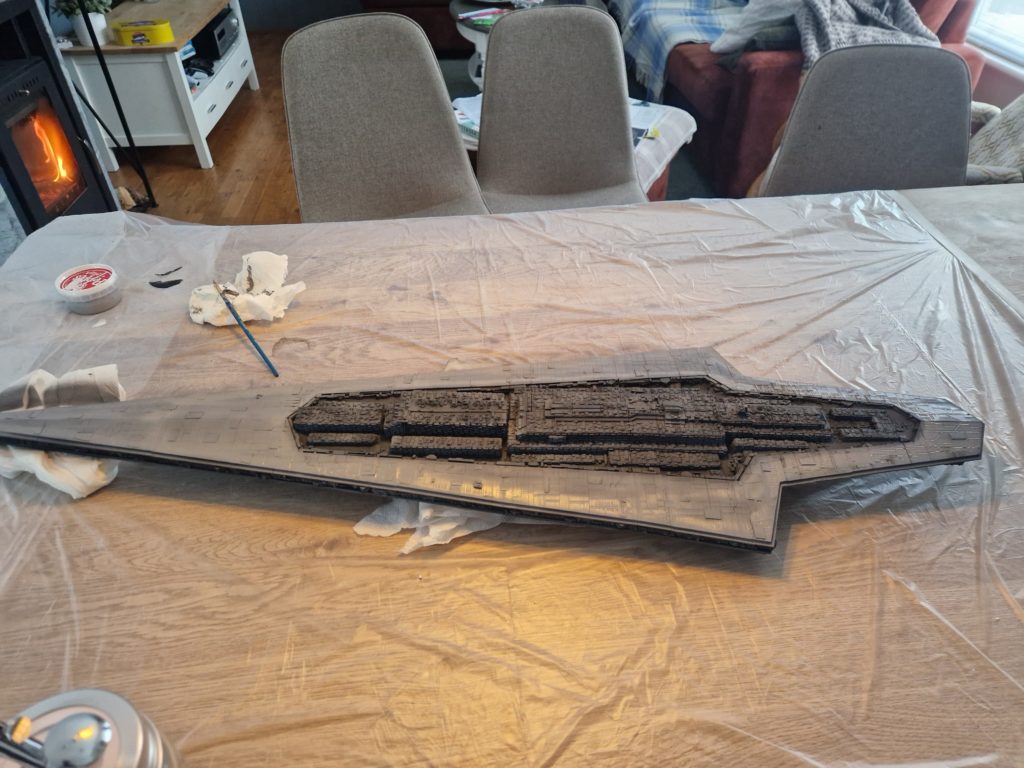
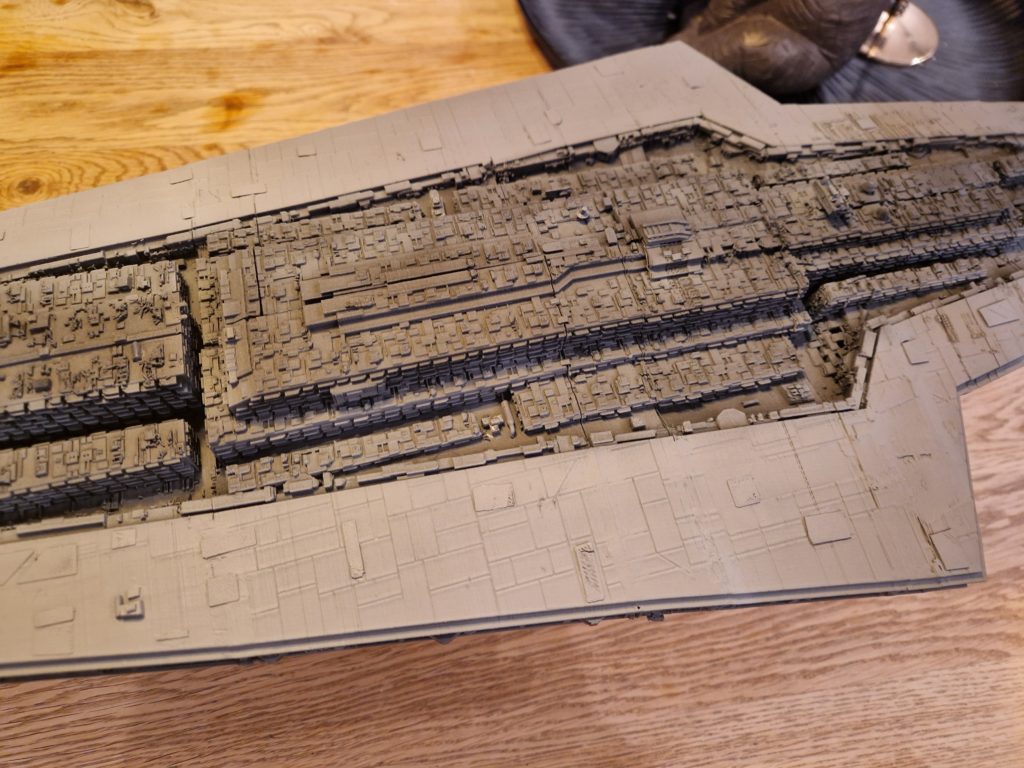
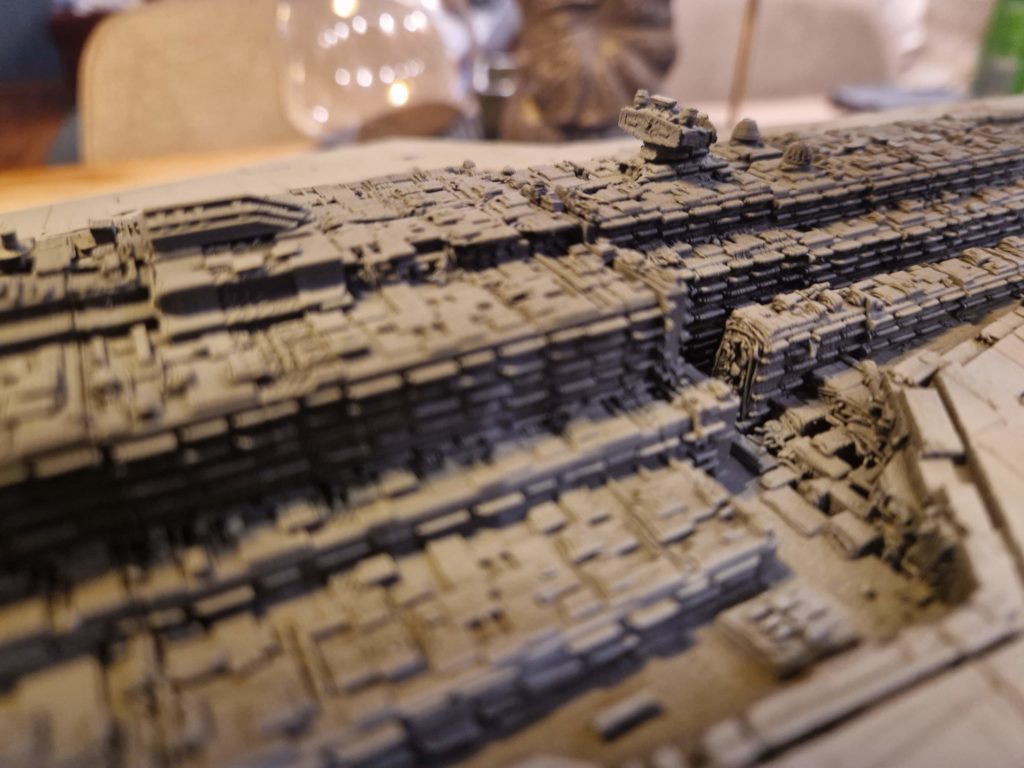
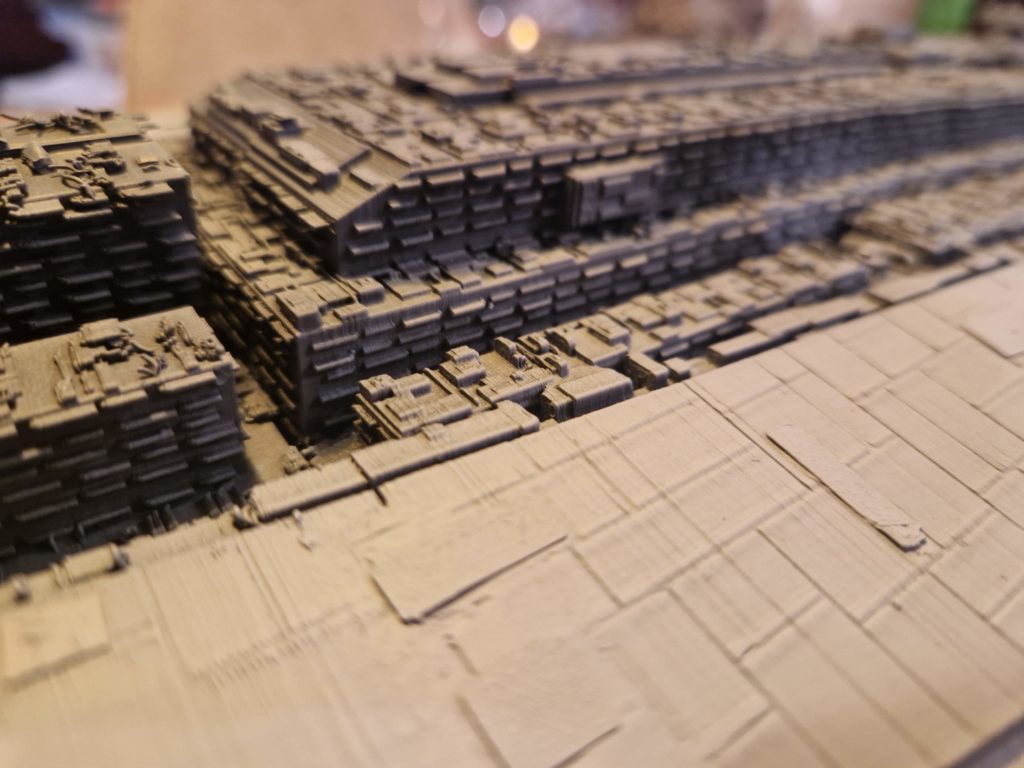
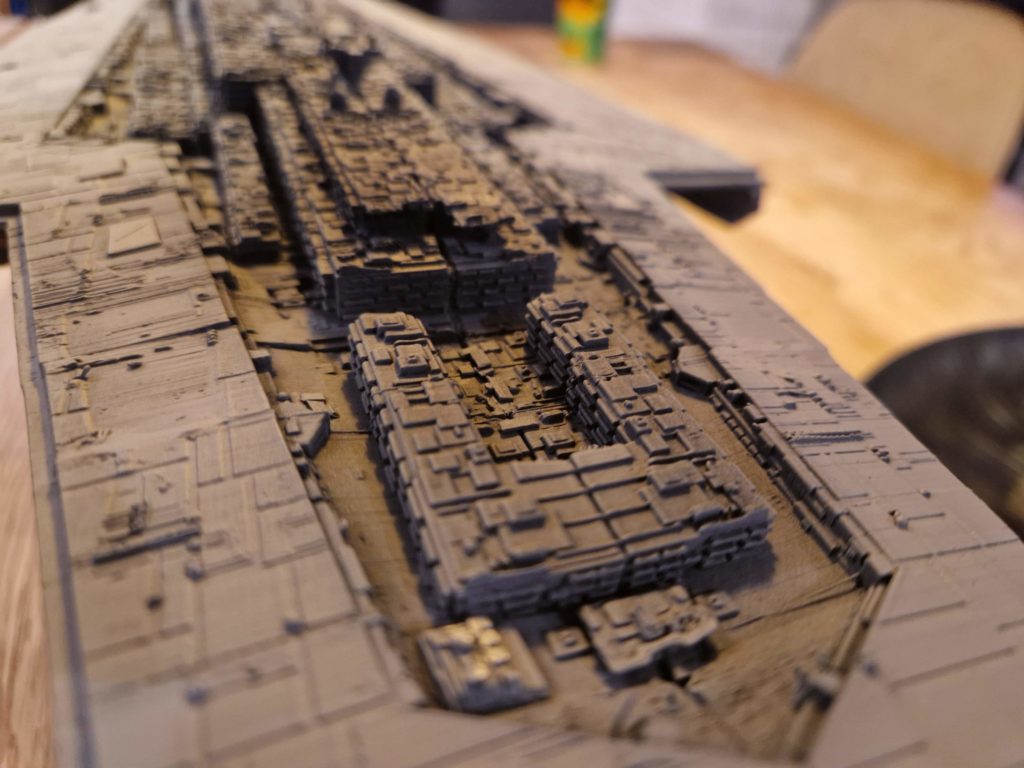
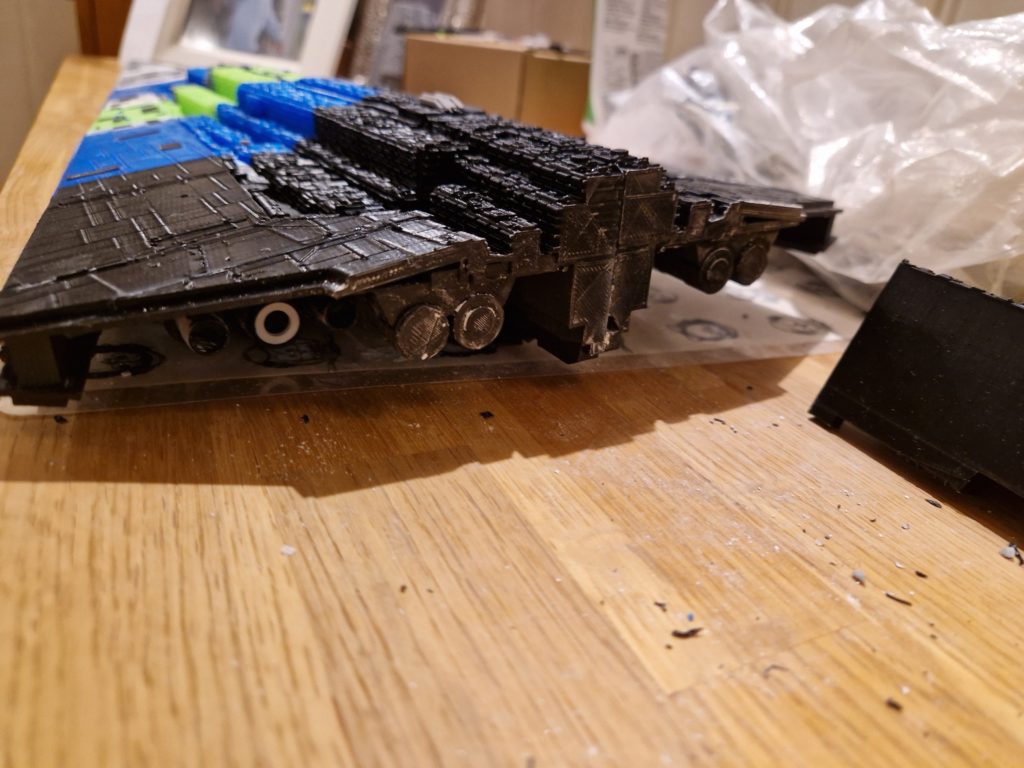
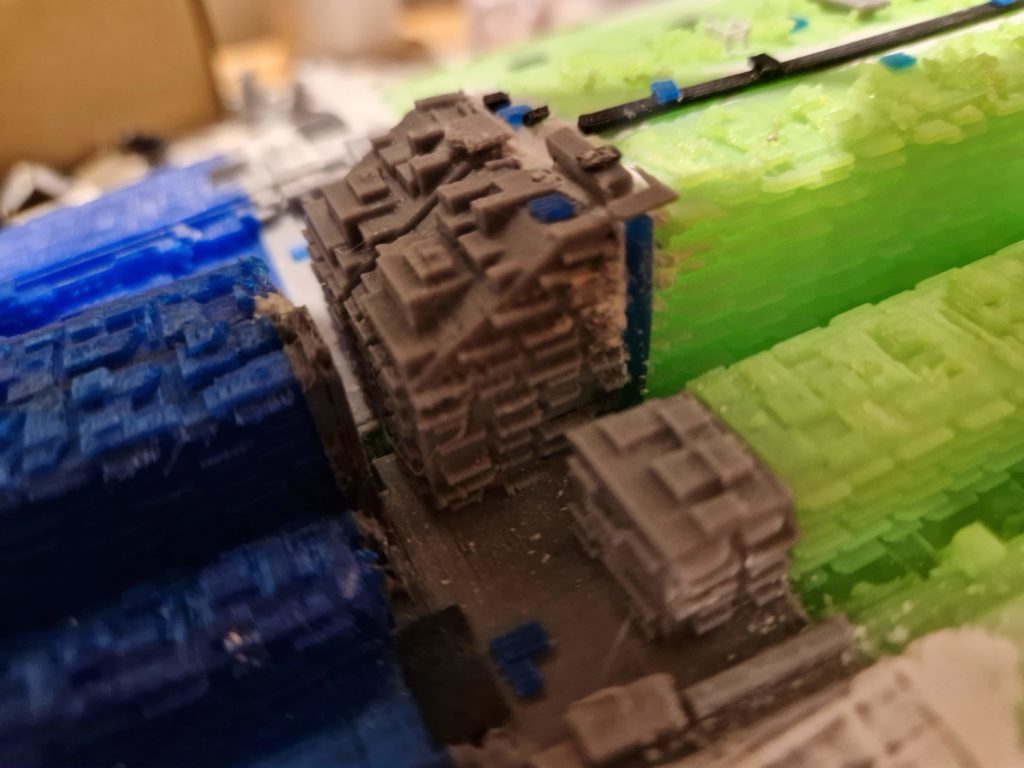
Printing the Trenches and Details
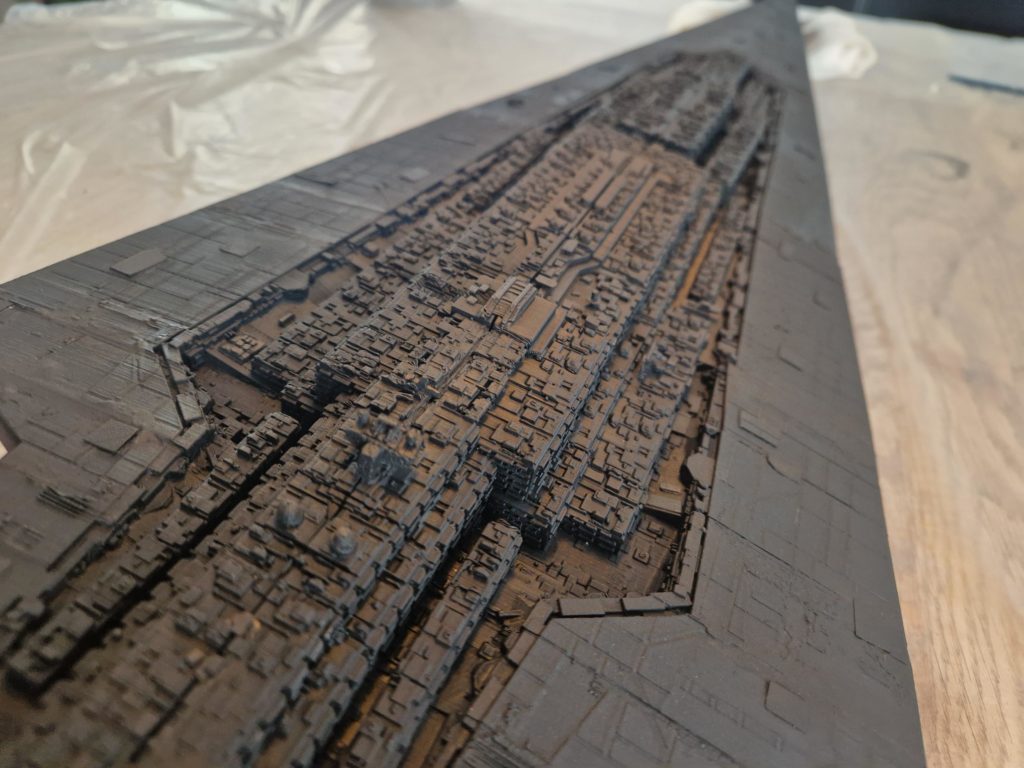
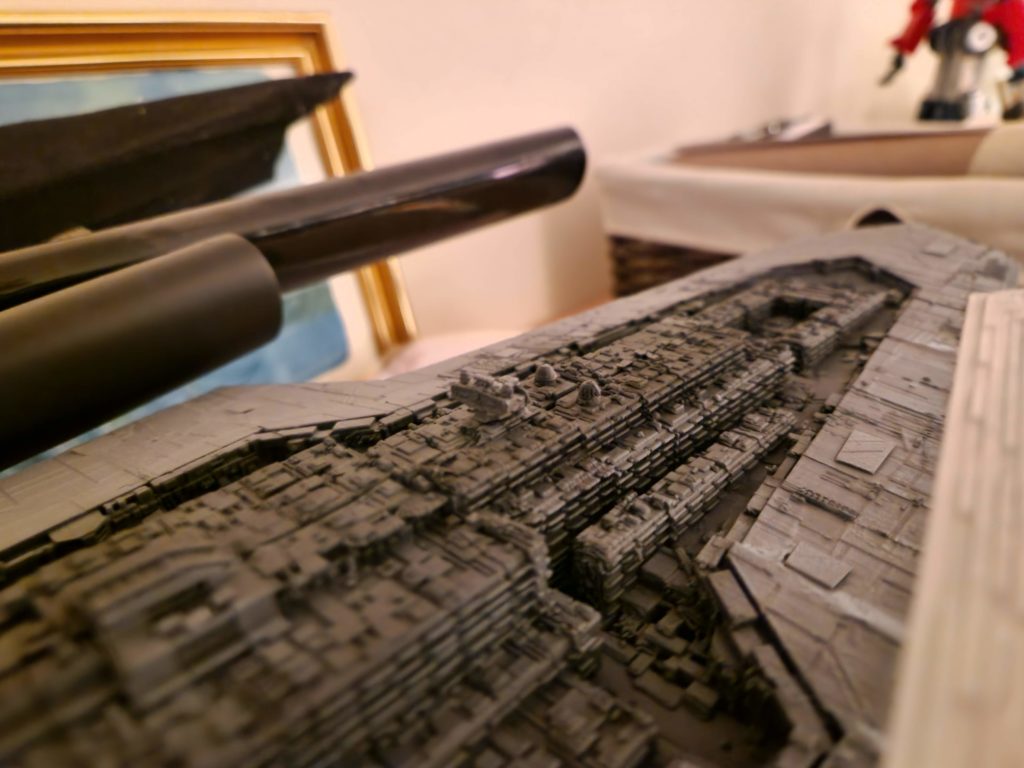
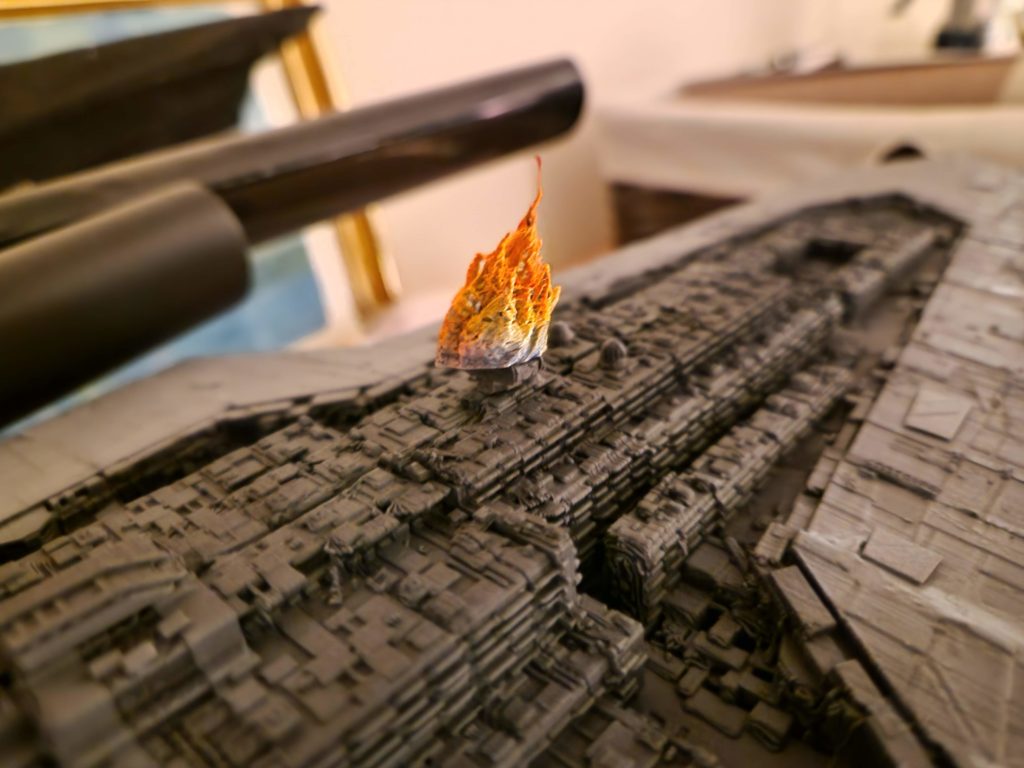
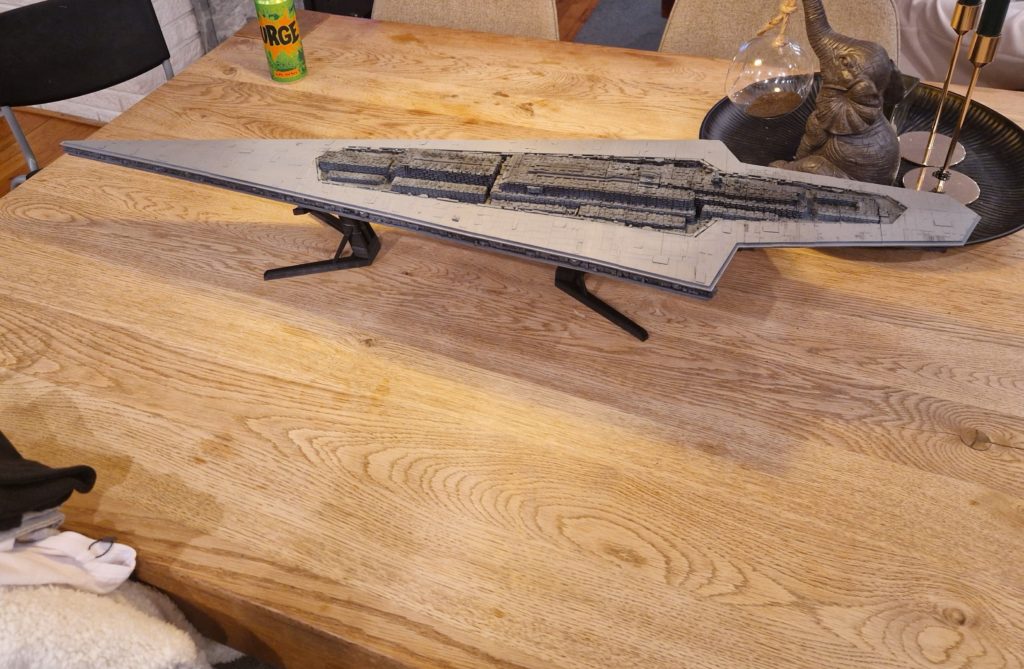
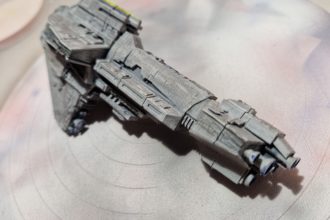
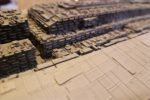
The side trenches contain the most recognizable greebles:
- Turbolaser batteries
- Shield generators
- Hangar bay recesses
- Mechanical piping and vents
These were printed at slower speeds to preserve crisp edges.
Post‑Processing and Cleanup
Removing Supports
Supports were carefully removed to avoid damaging the tiny trench details.
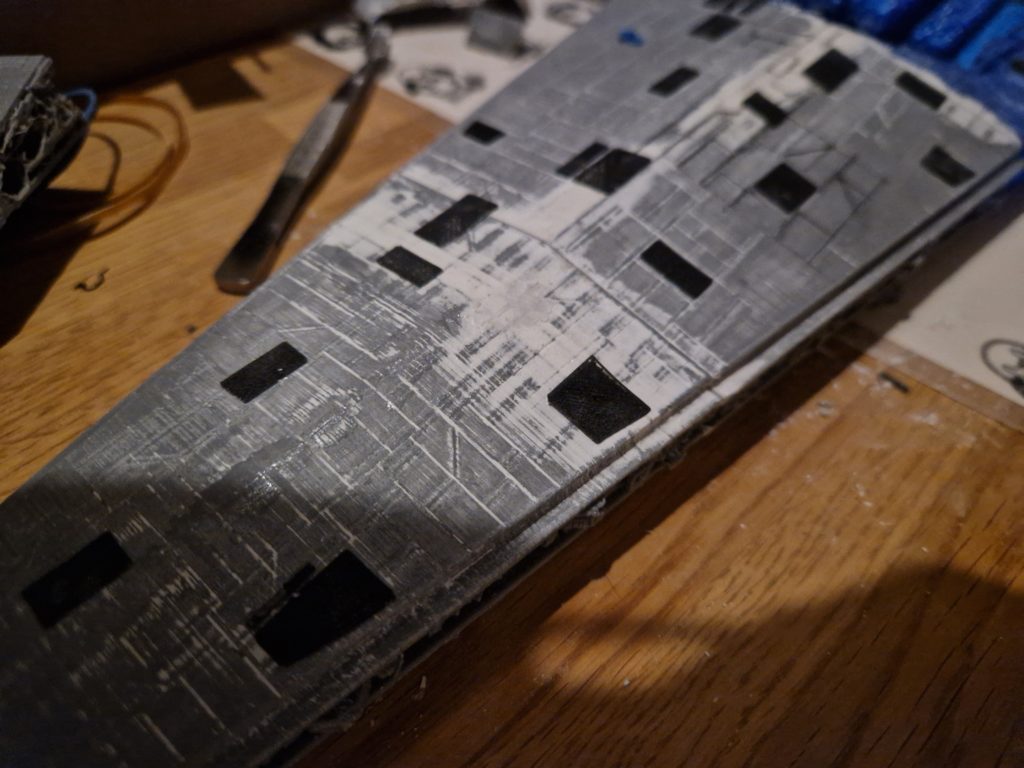
Sanding and Smoothing
Because the model is so large, surface quality matters:
- 220 grit to remove layer lines
- 400–600 grit to smooth
- Spot putty for seams and gaps
- Wet sanding for final finish
The goal was to make the PLA look like cast metal plating.
Test‑Fitting the Hull
Before gluing, all major sections were dry‑fitted:
- Upper hull alignment
- Lower hull curvature
- Bridge tower fit
- Engine cluster symmetry
Internal support ribs were added to keep the 1‑meter structure straight and rigid.
Assembly
Joining the Hull Sections
Cyanoacrylate glue and epoxy were used depending on the stress points. Internal reinforcement rods were added to prevent sagging over time.
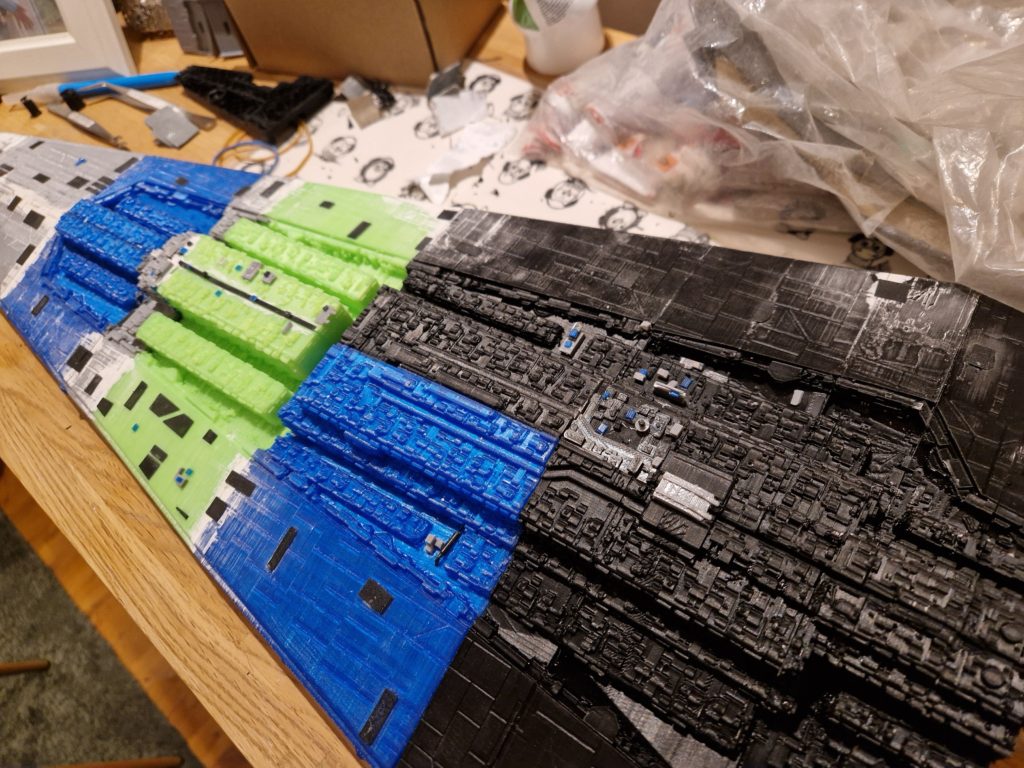
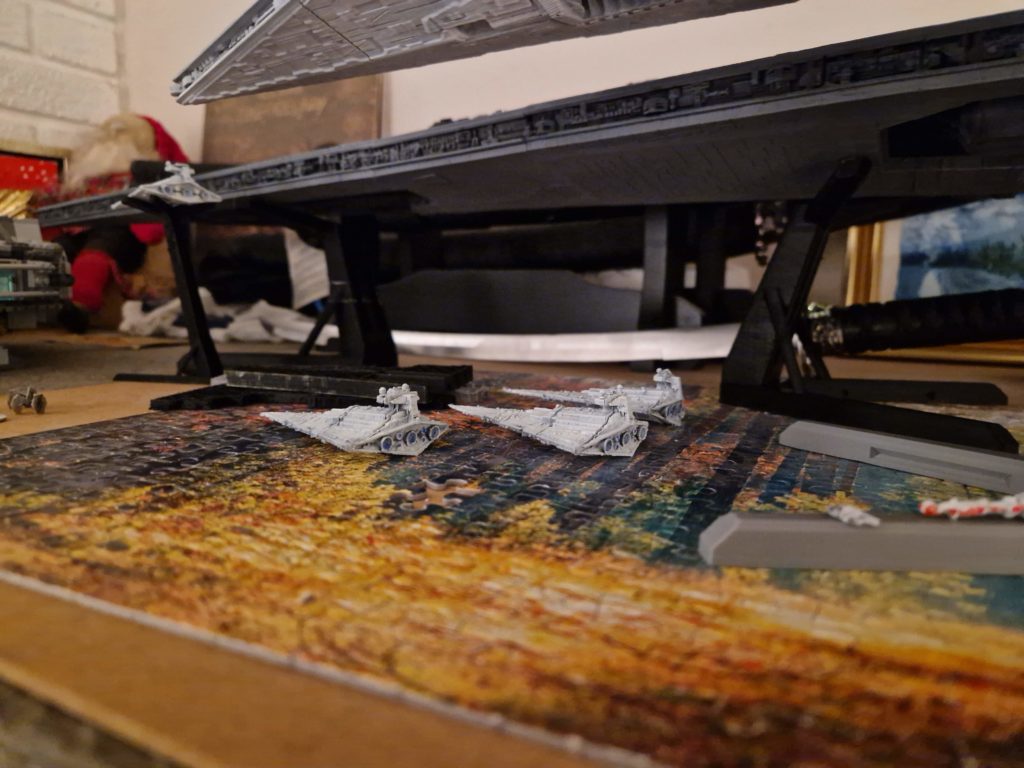
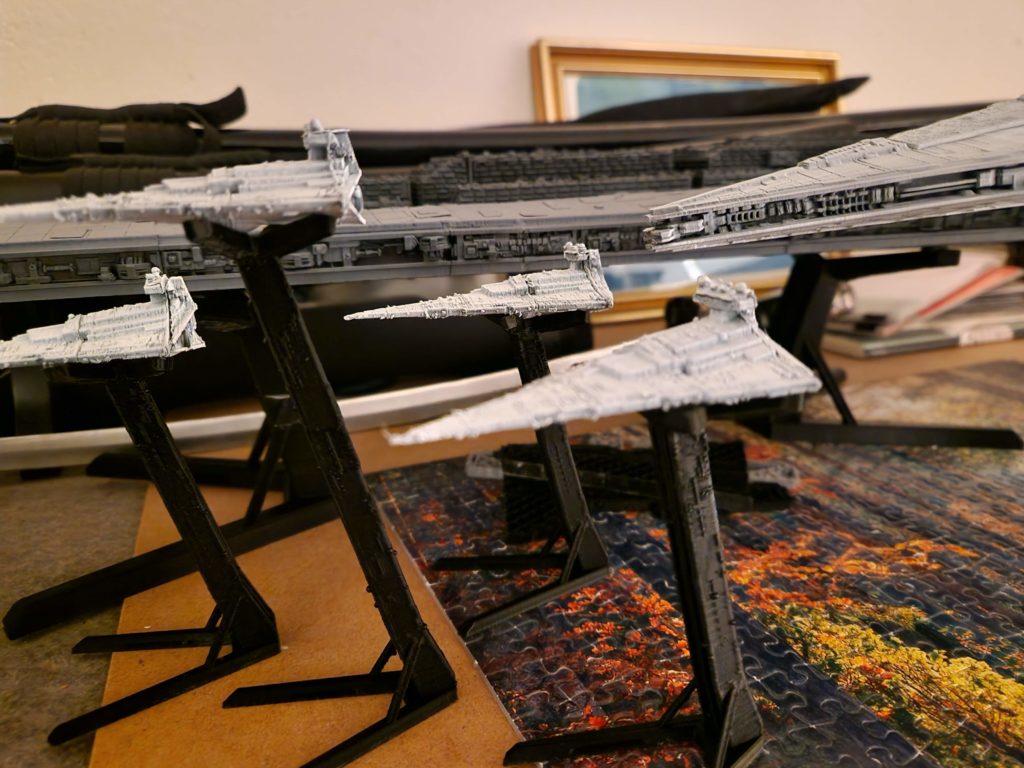
Installing the Trenches
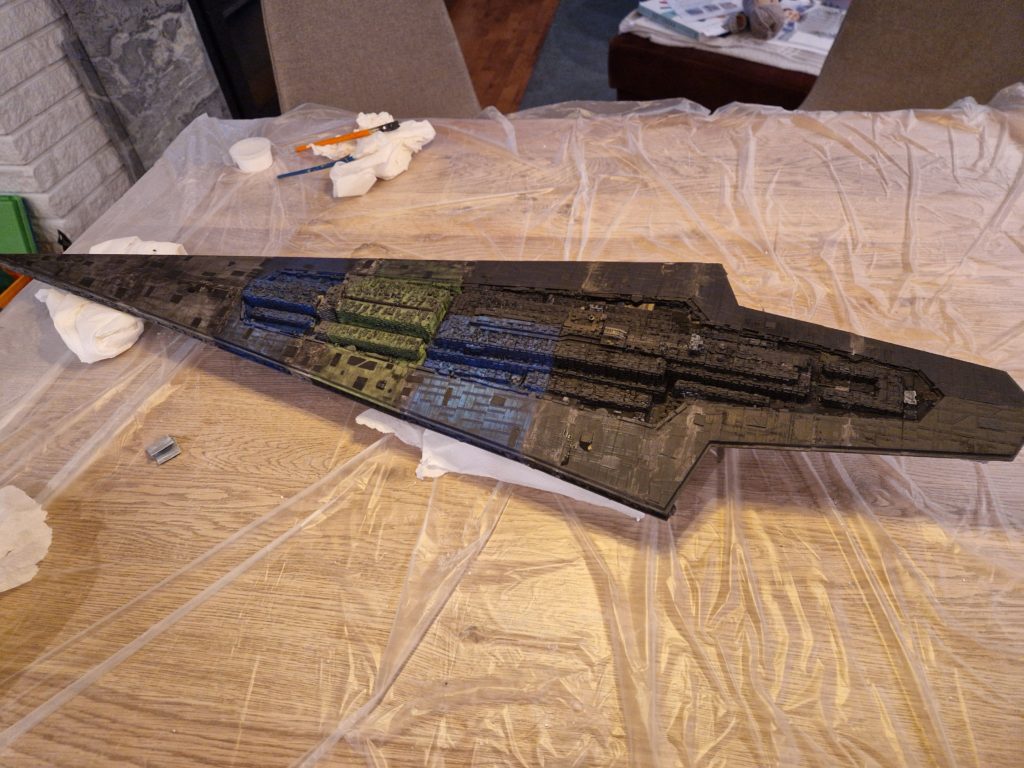
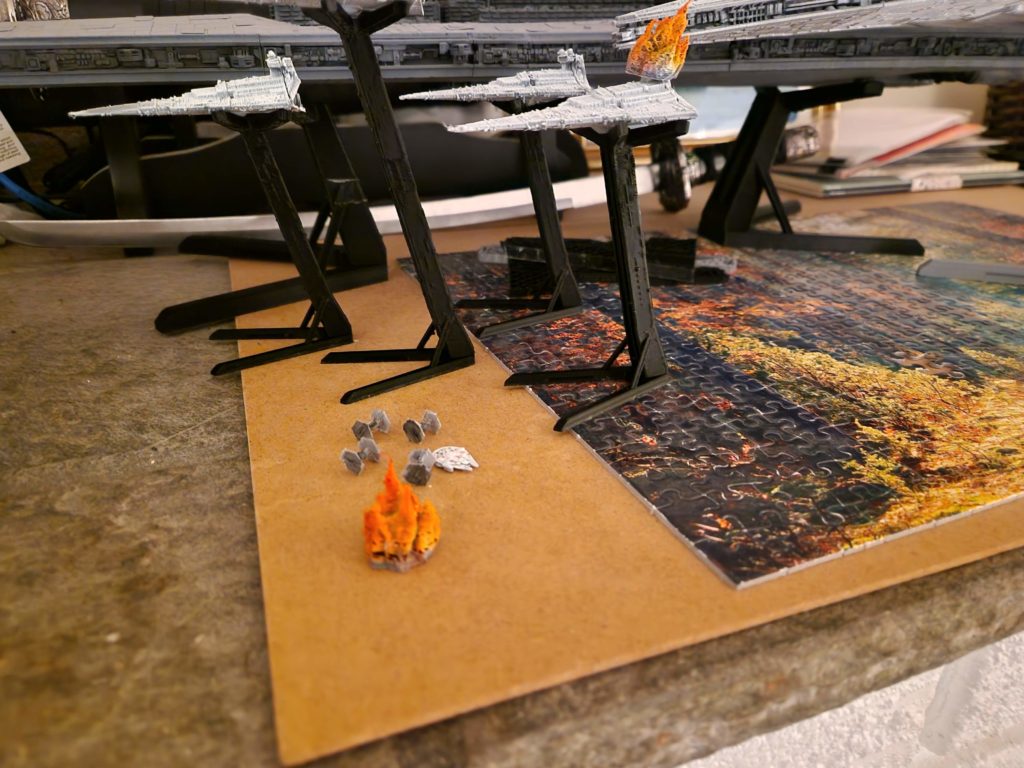
The trenches define the Executor’s silhouette. Each module was aligned so the panel lines flowed naturally from bow to stern.
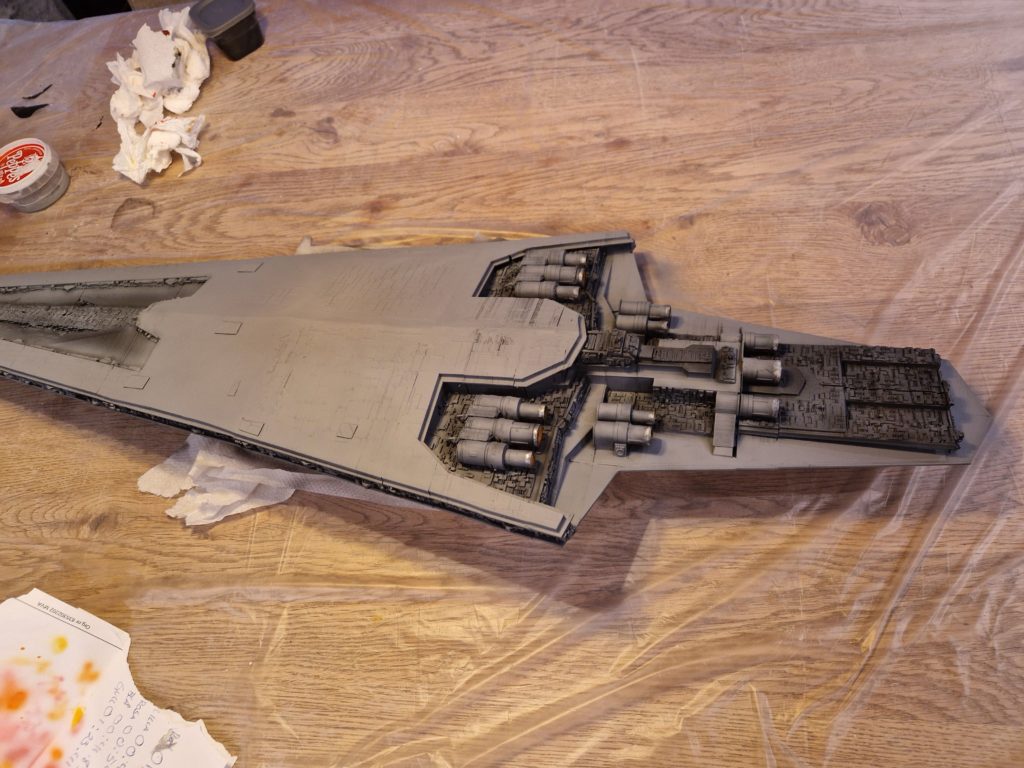
Bridge Tower and Engines
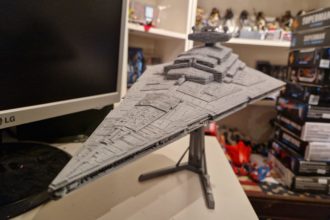
The Executor’s command tower—home to Vader’s meditation chamber—was printed in multiple parts and assembled with care to preserve the iconic twin shield domes.
The engine cluster, with its massive central thrusters, was glued and sanded until the rear profile matched the film appearance.
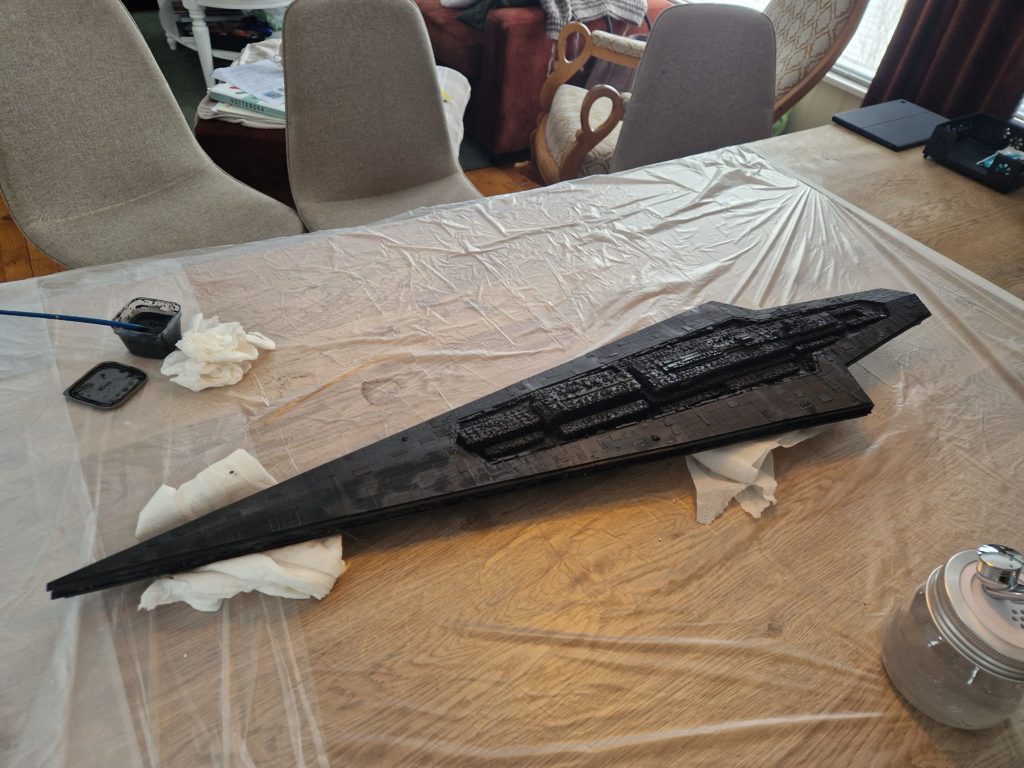
Priming the Model
A uniform grey primer coat was applied:
- Reveals imperfections
- Helps unify the many printed parts
- Provides a base for the Imperial grey paint
Any remaining seams were filled and re‑primed.
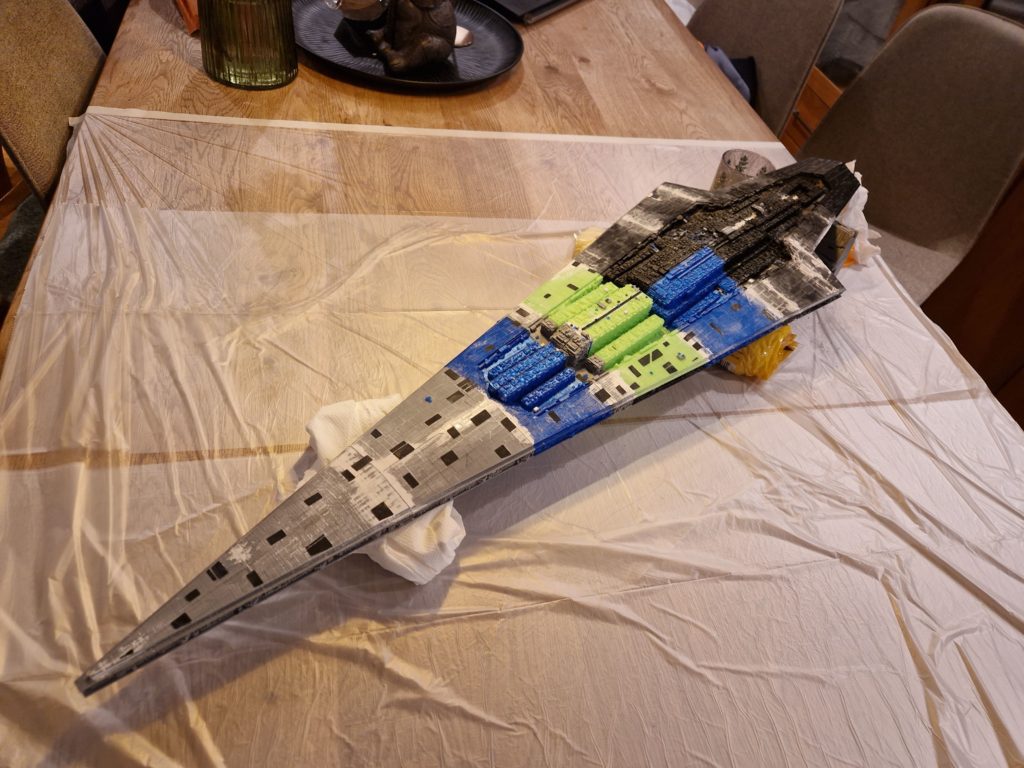
Painting the Super Star Destroyer
Base Color
The Executor is not pure grey—it has a slightly blue‑tinted, cold metallic tone. An airbrushed mix of light grey with a hint of blue gives the ship its cinematic look.
Panel Shading
To emphasize scale:
- Darker grey in recesses
- Lighter grey on raised edges
- Subtle shading along the hull spine
The Executor is enormous—19 kilometers long in canon—so weathering must be subtle and uniform.
Detailing the Trenches
Fine brushes were used to pick out:
- Turbolasers
- Sensor arrays
- Mechanical greebles
A dark wash was applied to deepen shadows and bring out the complexity of the trench work.
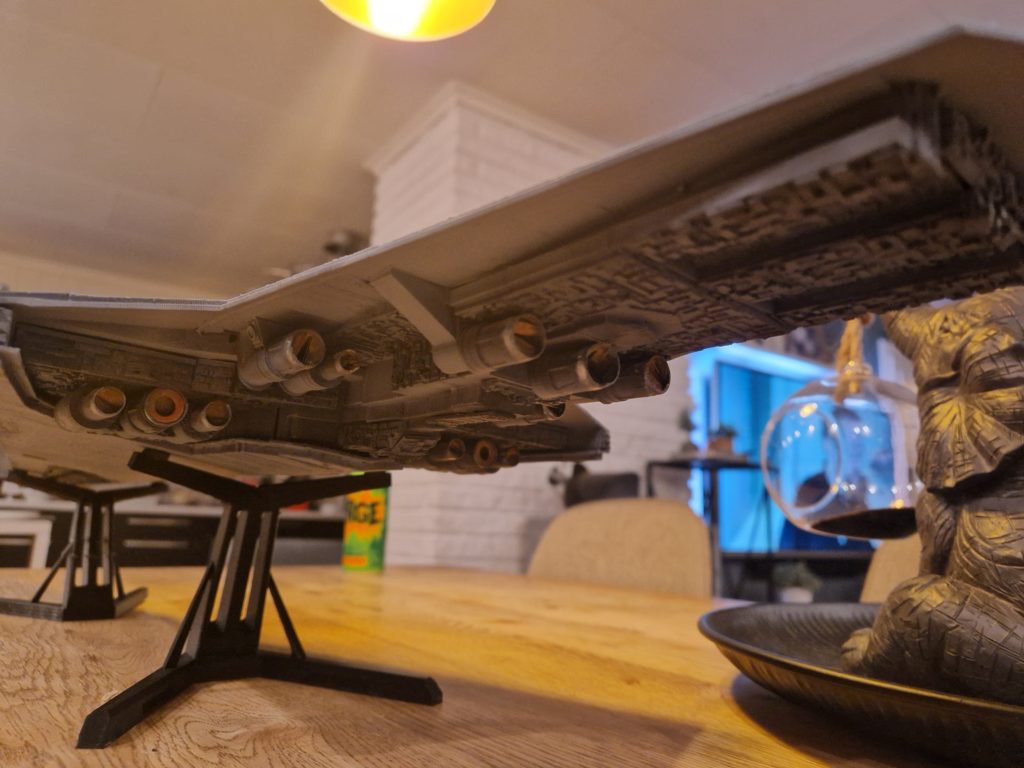
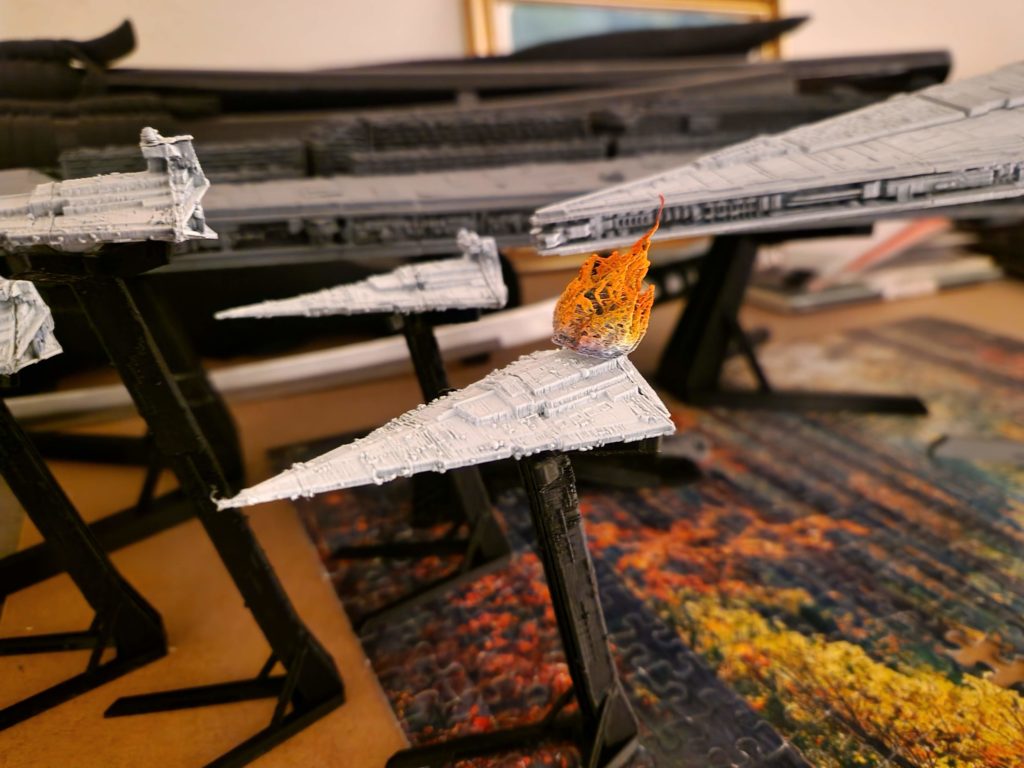
Engine Glow
The engines were painted with:
- Metallic base
- Blue‑white gradient
- Soft airbrushed glow
This recreates the Executor’s powerful sublight engines seen in The Empire Strikes Back.
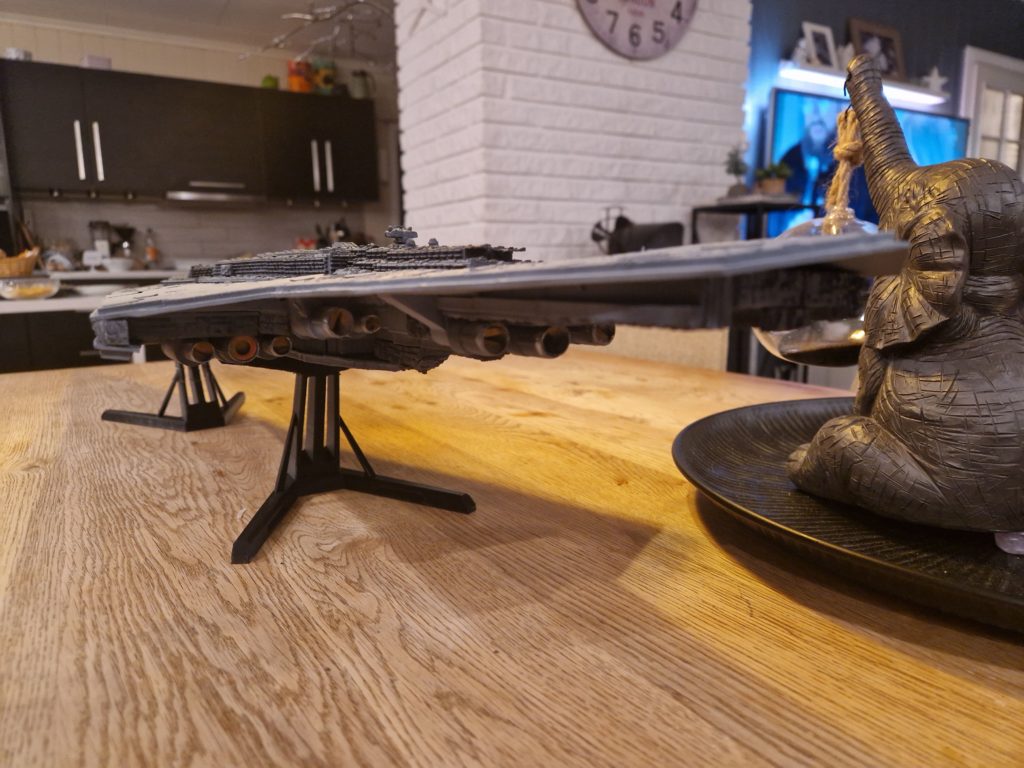
Final Assembly and Display
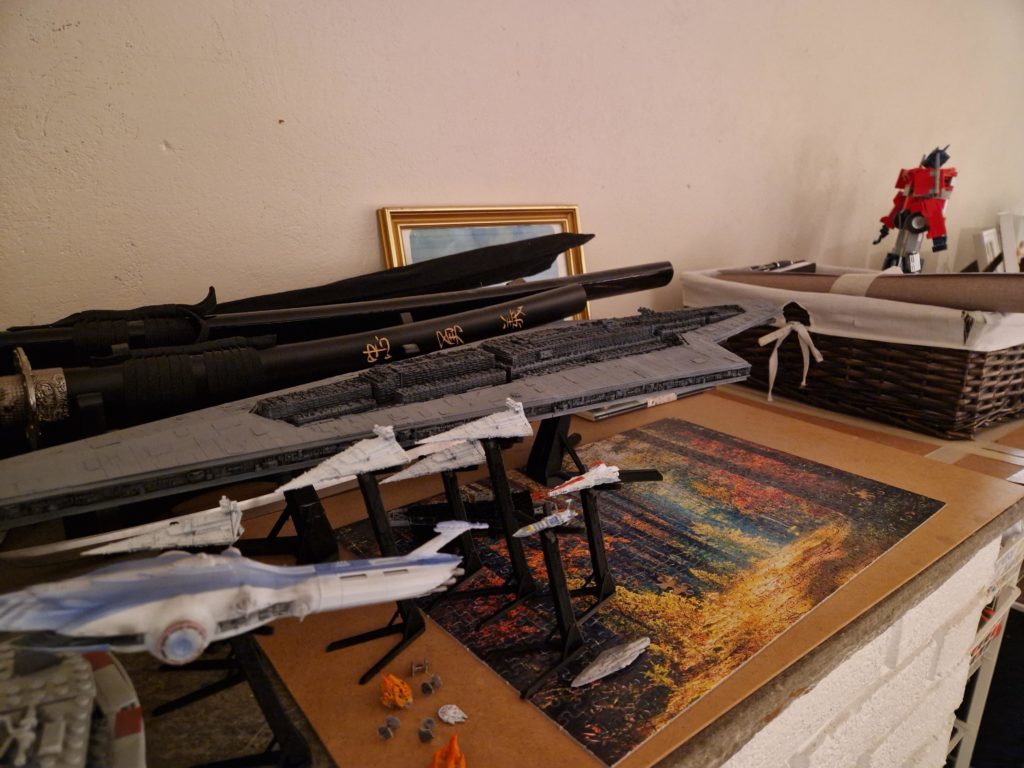
Once painted, all components were permanently joined. The final model—1 meter long—captures the intimidating presence of Vader’s flagship as it appears when it emerges from the darkness behind the Rebel fleet or when it leads the assault on Hoth.
A custom stand was added to support the ship’s weight and display it at a slight upward angle, echoing its cinematic profile.